 Pin it
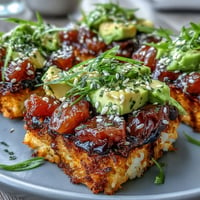
 My neighbor handed me a plate of these through the fence one rainy afternoon, still warm and shiny with glaze. I bit into one and the cheese stretched out like a ribbon, the sweet-salty coating clinging to my fingers. She called them imomochi and said her grandmother used to make them every week in Hokkaido. I went inside and boiled potatoes immediately. That was three years ago, and I've been making them ever since.
I made these for a potluck once and watched a grown man eat five in a row without speaking. His wife laughed and said he never eats potatoes. He shrugged and reached for another. By the end of the night, people were asking if I could teach a class. I just smiled, because honestly, if you can mash potatoes, you can make these.
Ingredients
- Russet potatoes: Their starch content makes the dough hold together beautifully without falling apart during frying.
- Potato starch: This is what gives imomochi that signature chewy bite, cornstarch works but the texture is slightly less stretchy.
- Unsalted butter: A small amount adds richness and helps the dough come together smoothly while still warm.
- Mozzarella cheese: It melts into gooey pockets that stretch when you bite in, use block mozzarella and cut it yourself for best results.
- Soy sauce: The base of the glaze, it clings to the fried surface and caramelizes into something deeply savory.
- Honey: Balances the saltiness and helps the glaze thicken into a sticky coating that coats every curve.
- Mirin: Adds a subtle sweetness and shine, if you dont have it, a pinch of sugar and a splash of water work in a pinch.
- Rice vinegar: Just a teaspoon cuts through the richness and keeps the glaze from feeling too heavy.
Tired of Takeout? 🥡
Get 10 meals you can make faster than delivery arrives. Seriously.
One email. No spam. Unsubscribe anytime.
Instructions
- Boil the Potatoes:
- Drop the chopped potatoes into salted boiling water and cook until a fork slides through with no resistance, about 12 to 15 minutes. Drain them well so no extra water dilutes your dough.
- Mash and Season:
- Mash the potatoes until completely smooth, no lumps allowed or they'll show up later. Stir in the butter and salt while everything is still steaming hot.
- Form the Dough:
- Add the potato starch and knead gently until the mixture becomes soft and slightly sticky, like playdough that clings just a little to your hands. If it's too wet, sprinkle in a bit more starch.
- Stuff with Cheese:
- Divide the dough into 8 pieces, flatten each into a disc, tuck a cheese cube in the center, and pinch the edges to seal it completely. Roll it gently into a smooth ball.
- Pan Fry Until Golden:
- Heat the oil in a nonstick skillet over medium heat and add the dumplings, turning them every couple of minutes until each side is crispy and golden brown. This takes about 6 to 8 minutes total.
- Glaze and Serve:
- Mix the soy sauce, honey, mirin, and rice vinegar in a small bowl, then pour it into the skillet with the dumplings. Toss gently and let the sauce bubble and thicken for a minute or two until it coats everything like lacquer.
 Pin it
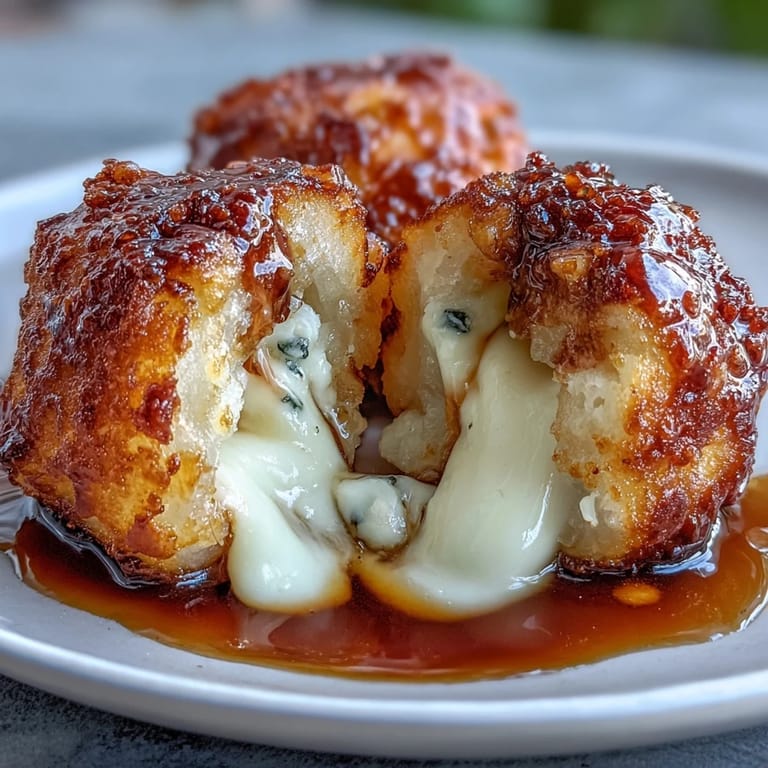
 My daughter once asked if we could have these for breakfast. I said no, then made them anyway and we ate them with scrambled eggs. She dipped hers in ketchup, which horrified me at first, but I tried it and understood. Now it's a weekend tradition, and I've stopped pretending to have rules about what counts as breakfast food.
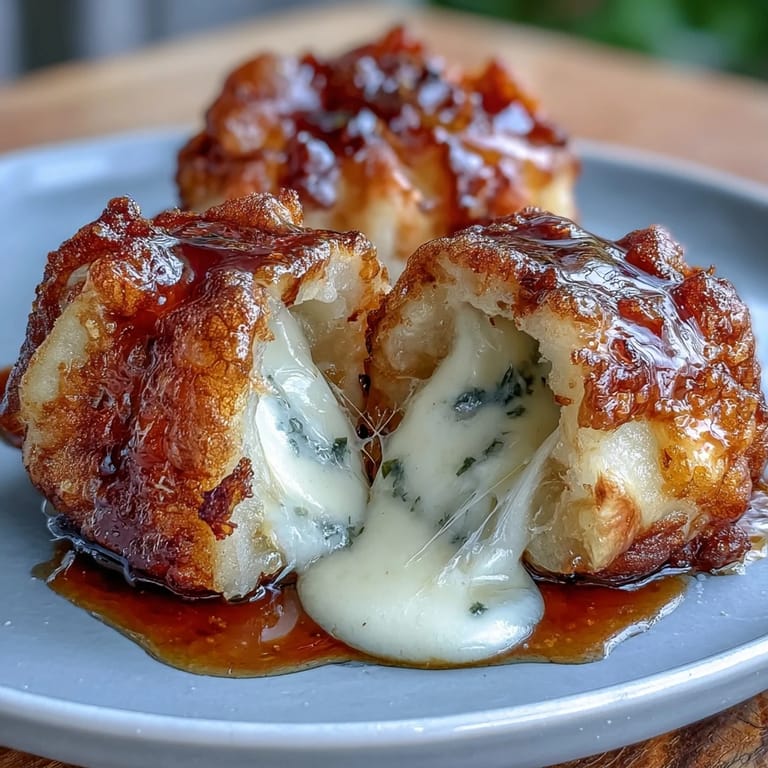
Choosing Your Cheese
Mozzarella is classic because it melts into those long glossy strings everyone loves. But I've used sharp cheddar when I wanted something bolder, and gouda when I felt fancy. A friend once stuffed hers with cream cheese and chives, and I'm still thinking about it. The key is to use something that melts well and doesn't crumble.
Making Them Ahead
You can shape the dumplings, freeze them on a tray, then toss them in a bag for later. Fry them straight from frozen, just add an extra minute or two to the cooking time. I keep a batch in the freezer for nights when I need something comforting but don't want to think. They've saved me more times than I can count.
Serving Suggestions
These are perfect on their own, but I've served them alongside miso soup and pickled vegetables for a light meal. They also work as an appetizer before ramen or donburi. Sometimes I'll put out a little dish of extra glaze for dipping, or sprinkle toasted sesame seeds and sliced scallions on top for color.
- Serve them hot, the cheese is best when it's still molten inside.
- Pair with a crisp cucumber salad to balance the richness.
- Leftovers reheat beautifully in a hot skillet with a splash of water to steam them back to life.
 Pin it
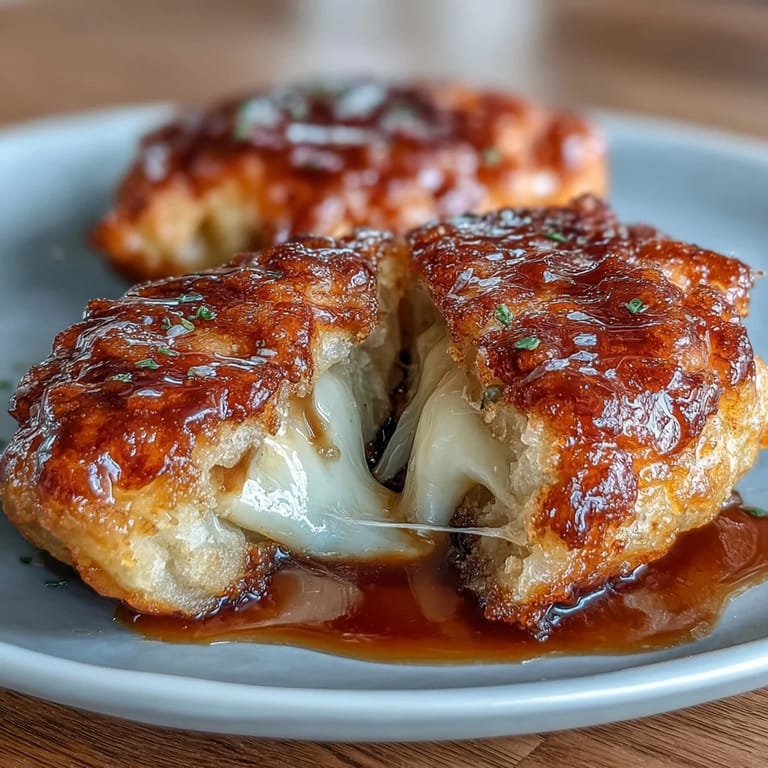
 There's something about pulling apart a dumpling and watching the cheese stretch that makes people smile, every single time. Make these once and you'll understand why my neighbor kept that recipe in her family for generations.
Frequently Asked Questions
- → Can I make the dough ahead of time?
Yes, you can prepare the potato dough up to 1 day in advance. Wrap it tightly in plastic wrap and refrigerate. Bring to room temperature before shaping and filling.
- → What type of cheese works best?
Mozzarella is ideal for its mild flavor and stretchy melt. Cheddar, gouda, or any melting cheese also works well. For vegan versions, use plant-based cheese alternatives.
- → Can I use sweet potatoes instead?
Yes, sweet potatoes can be substituted for a slightly sweeter flavor and different color. Adjust starch quantity as needed since sweet potatoes have different moisture content.
- → How do I prevent the dumplings from falling apart?
Ensure the dough is well-kneaded and not too wet. Seal the cheese filling completely, and use enough potato starch to achieve a pliable consistency that holds together during frying.
- → Can these be baked instead of fried?
Yes, brush with oil and bake at 200°C (400°F) for 20-25 minutes, turning halfway, until golden. Brush with the glaze during the last few minutes of baking.
- → How should I store leftovers?
Store in an airtight container in the refrigerator for up to 3 days. Reheat in a skillet over medium heat to restore crispiness, or microwave briefly for softer texture.